Install and Set Up Frontend
Zaparoo Frontend runs on MiSTer FPGA and connects to the local Zaparoo Core service.
Requirements
Frontend is built for Zaparoo Core v2.17.0 or newer. Update All installs matching versions of both. If you install by hand and Core is older, Frontend still connects but shows an Update Zaparoo Core warning at startup and some features may not work until you update.
On MiSTer, install or update Core from Update All. Update All can automatically configure Frontend in your MiSTer.ini file.
You can also install Frontend through MiSTer Companion, or install it manually from the release ZIP.
If you are using a SuperStation ONE or another MiSTer image that already includes Zaparoo, update Zaparoo Core before starting Frontend. Some images include old Core builds, such as v2.6.2, that do not support Frontend. If Frontend warns that Core is too old, update Core, then reboot MiSTer or restart Frontend.
Manual install
For manual installation, download the release ZIP from GitHub Releases.
The ZIP contains license files, a README.txt, and a zaparoo folder with these files:
MiSTer_Zaparoofrontendmenu_zaparoo.rbf
Install Frontend (consider a local backup first, since this edits MiSTer.ini):
-
Copy the
zaparoofolder to the root of your MiSTer SD card. -
Edit your
MiSTer.inifile and add this line under the[MiSTer]or[Menu]section:main=zaparoo/MiSTer_Zaparoo -
Start or reboot your MiSTer. Frontend will start automatically.
To switch Frontend off for a while, use the Frontend row on the MiSTer OSD's System Settings > Zaparoo page, which comes with Zaparoo MiSTer Main. To uninstall it, remove the main=zaparoo/MiSTer_Zaparoo line from MiSTer.ini to return to the stock MiSTer menu.
Updating
The standard MiSTer build of Frontend includes a built-in updater. From the Hub, select Update to run the MiSTer Downloader, the same tool behind Update All, without leaving Frontend. It shows progress on a controller-friendly screen. The tile is greyed out with No internet connection when the MiSTer is offline.
This is separate from Update media database, which only rescans your game library. See First run for the library scan.
You can still update manually by downloading a new release ZIP and replacing the files from the Manual install steps.
First run
The first start shows a welcome notice explaining the non-commercial license; select I understand to continue. Frontend then connects to Core locally. If your media database is empty, Frontend starts the first media database update in the background. While it runs, the Hub shows Updating the media database with the note that your games appear as Core finds them; if nothing is found, it shows No games found yet with a pointer to Settings > Library.
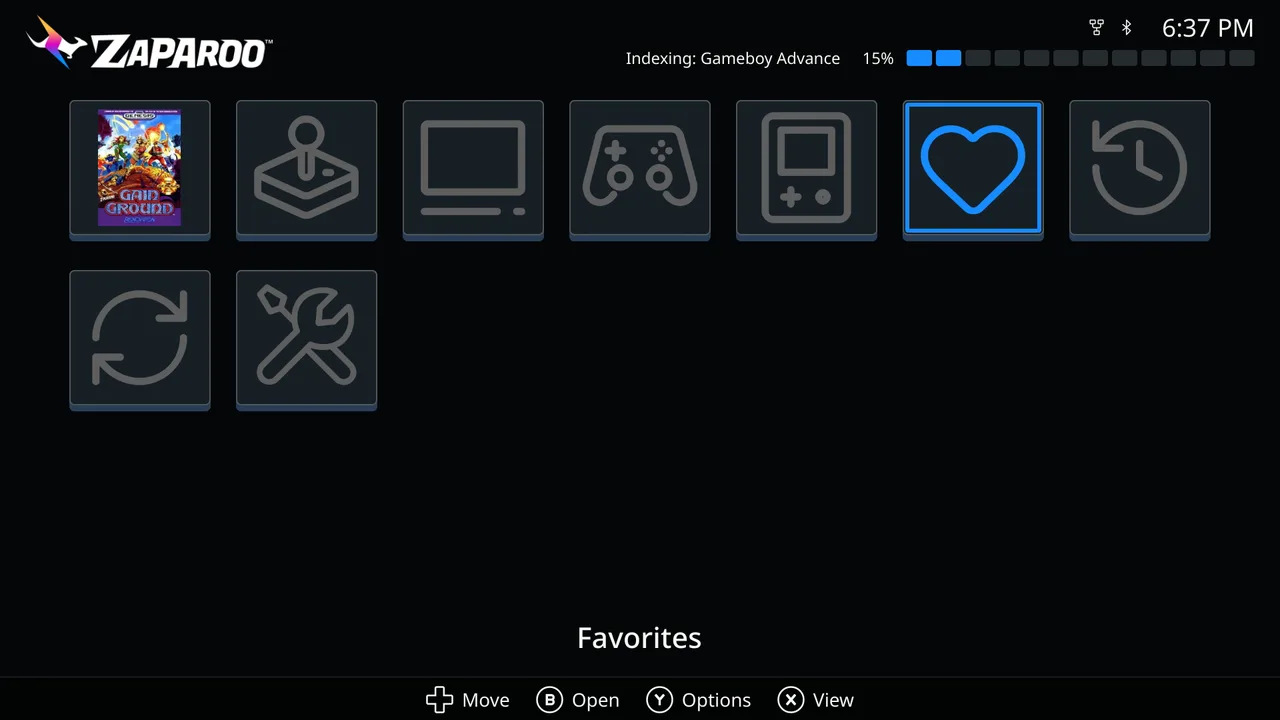
You can update the media database later from Settings > Library > Maintenance. You can also open a system's options menu and update that system on its own.
After the first scan:
- Add artwork and metadata for game covers, screenshots, and descriptions.
- Browse and launch games from the library hub.
- Troubleshoot Frontend if games do not appear or setup does not finish.
Display setup
Frontend has display options for HDMI, CRT, and vertical setups, all under Settings > Display.
Enable CRT mode
If you use Frontend on a CRT, open Settings > Display > Analog video.
- CRT mode outputs a 15 kHz analog signal through the MiSTer's video out. Confirming it restarts Frontend so MiSTer can relaunch it in the new video mode.
- Video standard chooses NTSC (60 Hz) or PAL (50 Hz) when CRT mode is active. Changing it also restarts Frontend.
- Screen position opens a test pattern. Use the arrows to nudge the picture into place, then press any button to keep the position.
You can also toggle CRT mode from the MiSTer OSD, which is useful when you need to turn CRT mode on before you have access to an HDMI display. Press Menu on a controller or F12 on a keyboard, as you would in a normal MiSTer core, open System Settings, then Zaparoo, which sits directly above Reboot. CRT mode, Video standard, and Screen position are on that page, next to the other Zaparoo MiSTer Main settings.
CRT mode enables the pixel fonts and tighter layouts designed for 240p output. It also uses a safe area for menus while backgrounds and screensaver art can still fill the full CRT frame.
Enable TATE mode
TATE mode rotates Frontend for vertical display setups, such as arcade cabinets or MiSTer displays mounted for vertical games.
Open Settings > Display, then set Orientation to Rotated CW or Rotated CCW to match your display. Horizontal is the default.
Change the interface resolution
Open Settings > Display, then Interface resolution. Automatic (Recommended) picks an integer division of your output up to 720 lines high, so a 1080p display runs at 960 by 540 and a 1440p display at 1280 by 720. The other options are exact divisors of your output up to 1080 lines high; the full 1080p option runs with animations off. Changing it restarts Frontend. A mode your display refuses is reset to Automatic.
Change the interface layout
Open Settings > Display, then Interface layout. Device default is the layout Frontend was built for, Standard is the TV layout, and Handheld packs the Hub into fewer columns for small screens.
Language, region, and controls
- Settings > Language sets the interface language (17 languages plus Automatic, applied after a restart), the Region used for system and game names (Automatic, Americas, Europe, or Japan), and the Clock format.
- Settings > Controls sets the Button style shown in on-screen prompts (automatic or styles A to E), lets you swap the controller buttons for confirm and cancel or for Options and View, and turns Mouse support on.
- Settings > Appearance holds the color scheme and Color intensity, system logo style, Reduce motion, and the Screensaver timeout (off, or 1 to 30 minutes).
- Settings > About shows the version and license, a Documentation code you can scan to open this guide on your phone, the Debug logging switch (restarts Frontend), and Upload log file for support.